Following up from the previous blog post, it is time to exercise the Azure Storage Account to check out some of the basic features.
Here are the topics I will cover in this post:
- Create a storage account
- Create a container
- Upload a file to the container
- Retrieve the file from the container
- Storage Explorer
- Scripted File Transfers
Assumption: You have access to an Azure Subscription. Azure free accounts are available at: https://azure.microsoft.com/en-us/free/
Create a new Storage Account https://docs.microsoft.com/en-us/azure/storage/common/storage-account-create?toc=%2Fazure%2Fstorage%2Fblobs%2Ftoc.json&tabs=azure-portal
Create a storage account
Using the information from the first blog post, log in to the Azure Portal and select Storage Accounts from the list of services.
For the purposes of this article, here are the most important pieces of information to review while creating the storage account:
Resource Group: if one does not already exist, select a name to group resources together
Location: Pick the Azure location nearest to you
Performance: Standard
Account Kind: StorageV2 (general purpose V2)
Replication: Read-access geo-redundant storage (RA-GRS)
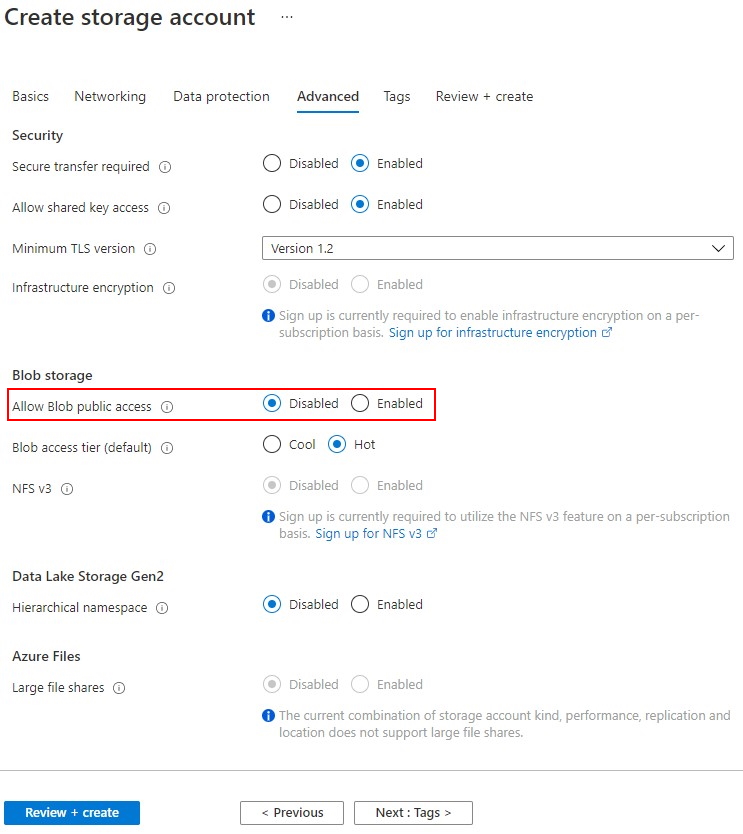
On the Advanced tab of the Create Storage Account process, make sure to set the “Allow Blob Public Access” to Disabled. This will prevent any unfortunate lapses of data being leaked from the storage account unintentionally.
Create a container
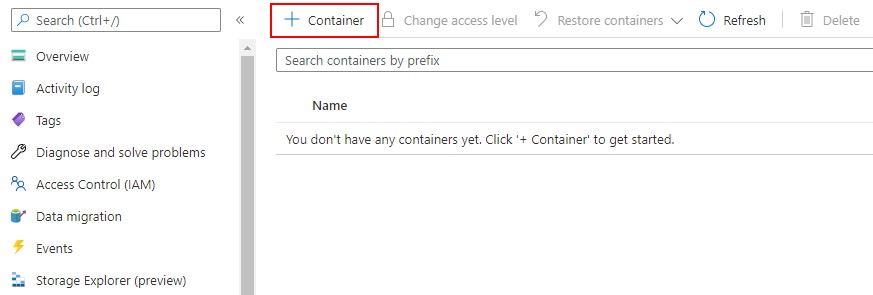
The primary area of the storage account that I will focus on will be the blob service. The blob service is the mechanism used to store large volumes of unstructured data like documents, images, audio and video files. The first step after we have the storage account is to create a container within the blob service. The container provides a hierarchical naming structure for the storage of blob data, much like directories or folders do within a typical file system. The Azure portal guides the user in this regard. When we click on Containers under the blob service navigation, we receive the help text on the page: “You don’t have any containers yet. Click ‘+ Container’ to get started. Let’s do that now providing a name. Notice that the default public access level is set to “Private (no anonymous access)”. This is good. Much like the public access being disabled on the blob storage service, the container has a separate layer of security that can be applied to the whole container or individual blobs. Leave the default setting of “Private” and we will see why this is important later.
Upload a file to the container
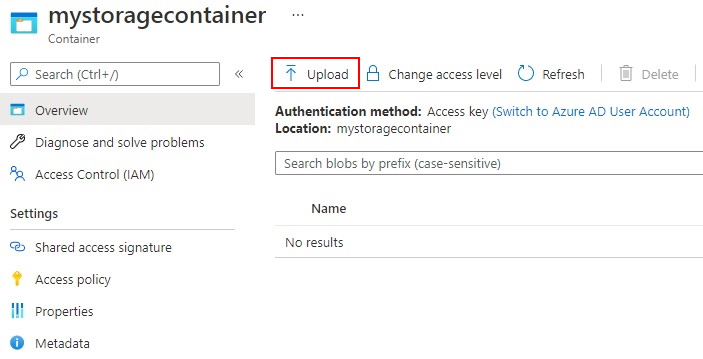
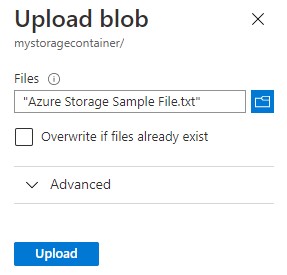
Within the list of containers in the blob service, you should now see the one container we just created. Select it from the list and let’s test out the container. We should now see that the Portal shows us an Upload menu option to help us get data into the container. We will look at ways of moving data in bulk in a moment, but select the Upload option and put a simple text file in the container for demonstration purposes.
Retrieve the file from the container
Within the container, we should now see the text file listed. Selecting the context menu (…) select properties to get some details on the uploaded file.

Next to the URL property, select the copy button to copy the file URL onto the clipboard. Open another browser window (in private mode so as not to share the currently authenticated Azure portal session) and paste in the URL.
You should see an error message that states public access is not permitted on this storage account. We uploaded the file and have a direct URL to it, so, what happened? Recall that both the Storage Account and Container are set to private access which prevents anonymous access to the file. For the majority of enterprise storage applications, this is a good thing. Even with distinct knowledge that a file exists at this specific location, we cannot get to the file without explicit access being granted. Let’s do that now.
Back in the Azure portal, open the properties for the text file again and select “Generate SAS” from the top menu.
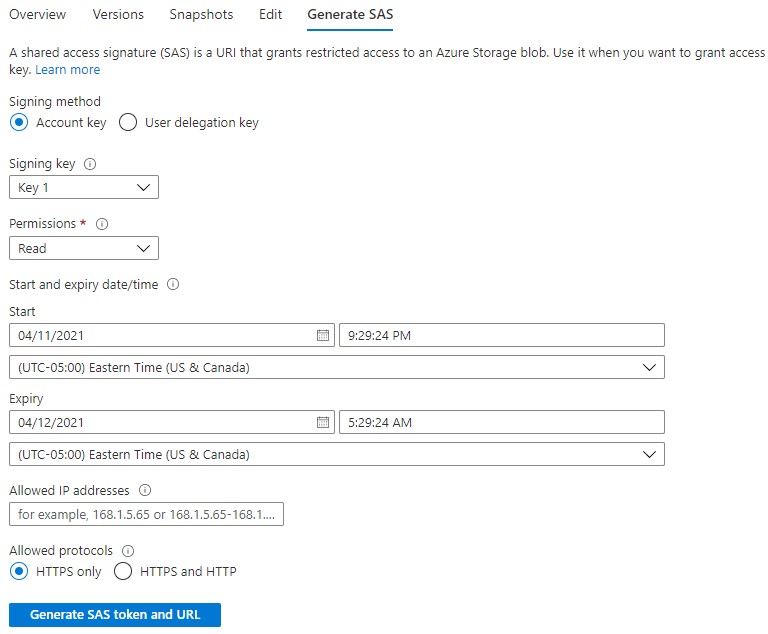
Looking at the options, we can choose the Permissions that need to be granted (in this case, Read only), the Start and Expiration times for the lifetime of the token and even a list of IP Addresses that can used to further minimize the potential risk of unwanted requests against the storage account. Leave the default values for now, select the “Generate SAS token and URL” button on the bottom of the page and copy the Blob SAS URL value. Go back to the unauthenticated browser window and paste in the URL with the generated SAS token. You should now see the text file contents. Note that the SAS token is only good for that specific file and cannot be used to access other files in the same container. The signature that is generated is specific to the file which provides very granular security even when using a delegated access token or when a container contains a large amount of content. We are also able to create a SAS token at the container level that could then be used to access all of the files within the container. This gives us a fair amount of flexibility when deciding how to generate a secure storage design.
Storage Explorer
Now that we have verified the basics of how a storage account and blob container operate, let’s investigate one of my favorite tools to use: the Azure Storage Explorer. For this next section, download and install the Storage Explorer: https://azure.microsoft.com/en-us/features/storage-explorer/
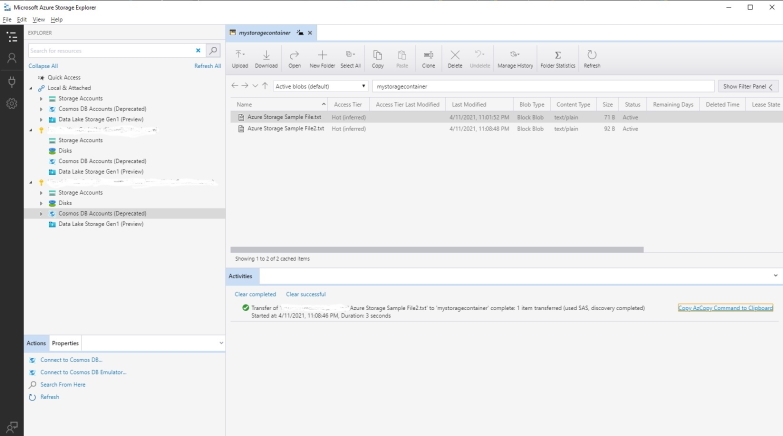
This tool is a graphical interface for the easy browsing of Azure Storage mechanisms including storage accounts and CosmosDB databases and the user interface looks similar to Windows Explorer. Not only is it a useful tool to use for quickly navigating a variety of storage options and bulk uploading of data, it is a really useful tool to learn how to generate commands that can be used in the Azure CLI and other enterprise software like Azure DevOps Pipelines. Connect Storage Explorer to your Azure subscription, navigate to your Storage Account and use it to upload and download files. In the Activities tab in the bottom of the Storage Explorer, select the “Copy AzCopy Command to Clipboard” link and paste the result into a text editor to review the command syntax.

With an AzCopy command like this, it could be plugged in to an Azure DevOps pipeline task and used to deploy code from a build server onto a target server securely without direct user interaction.
Scripted File Transfers
While the portal interface and Storage Explorer are useful for interactive sessions, the real power of Storage Accounts in the Azure platform is the ability to utilize the services programmatically. More often than not, we need to upload batches of files to storage or integrate data storage within applications. To fulfill our scripting needs, there are three convenient options to choose from: AzCopy, Azure PowerShell and Azure CLI. When it comes to integrating with an application, there are SDKs for .NET, Java, Python, Node/JS, C++, Go, PHP and Ruby that will streamline the integration even further. Here are a few examples of the different syntax with each option:
AzCopy
azcopy copy <file-path> <storage-account-url-with-sas-token> --recursive=true
Azure PowerShell
Set-AzStorageBlobContent
	-File <file-name>
	-Container <container-name>
	-Blob <blob-name>
	-Context <storage-acct-context>
Azure CLI
az storage blob upload
	--account-name <storage-account>
	--container-name <container>
	--name <blob-name>
	--file <source-file-name>
	--auth-mode <authentication>
Azure .NET SDK
BlobClient blobClient = containerClient.GetBlobClient(fileName);
using FileStream uploadFileStream = File.OpenRead(localFilePath);
await blobClient.UploadAsync(uploadFileStream, true);
uploadFileStream.Close();
I have found the performance of each of these techniques to be fairly comparable and the decision to use one or the other is typically up to user preference and scenario. The 3 scripting options are available in Azure DevOps and the developer experience is practically identical. For a deeper dive on chosing between data transfer options, take a look at the Azure documentation that provides a little more clarity on moving extremely large data sets between systems. https://docs.microsoft.com/en-us/azure/storage/common/storage-choose-data-transfer-solution?toc=/azure/storage/blobs/toc.json
Conclusion
In this post, we reviewed the steps to create a storage account and move data into a container with a variety of easy to use tools and command line options.
In the next post, we will look at a practical application of how I recently used an Azure Storage Account as the basis for my personal blog by enabling the Static Website feature.
Resource Links
What is Azure Blob Storage?
https://docs.microsoft.com/en-us/azure/storage/blobs/storage-blobs-overview
Azure Storage Explorer
https://azure.microsoft.com/resources/videos/introduction-to-microsoft-azure-storage-explorer/
AzCopy
https://docs.microsoft.com/en-us/azure/storage/common/storage-use-azcopy-v10
Azure PowerShell
https://docs.microsoft.com/en-us/azure/storage/blobs/storage-quickstart-blobs-powershell
Azure CLI
https://docs.microsoft.com/en-us/azure/storage/blobs/storage-quickstart-blobs-cli